Friday, August 31, 2012

Eating Our Way Through Spain

On the second day in Spain, we went to La Mercat la Boqueria for breakfast. Which was really lunch. Because we had too much Sangria the next before to actually get out of the hotel to eat anything resembling a breakfast.


At the market, I ate the world's best fig. I never knew that figs could taste like that. I'm forever ruined as I will never be able to eat another fig unless its out of a plastic cup in Barcelona.
In the Mercat, there was an amazing looking tapas bar, where you could pick out fresh seafood that they cooked on the grill in front of you. There were all sorts of items to choose from.


Of course, we chose clams that look like penises for our first course.


And a plate of octopus and Pimentos de Patron - our favorite peppers, but I won't bore you with yet another picture of them.    

 Initially, when I saw these, I thought the were cupcakes. Really they're meringues! Don't they look amazing. 


For dinner, we went to Bilbao Berria in the Barre Gotic as my friend's, Erica, suggestion. Bilbao Berria is a serve yourself kind of tapas place. You walk around with a plate and choose whichever tapas looks good to you. At the end of your meal, they count up your toothpicks and figure out your bill from there. It was definitely a fun dining experience. Especially since we're gigantic fat kids who love variety!


Of course, every meal includes Sangria. It's pretty much the same as water here. 
Iberian Ham with fried quail egg and a stuffed mushroom with cheese

White fish with eggs, caviar, and a dollop of olive tapenade
Roasted zucchini and brie on herbed flat bread


Same as above, just a prettier angle

Sardine with roasted red peppers and stuffed mussel

Morcilla (blood sausage) with red pepper, Croquette with Pimentos, flatbread with roasted veggies and anchovies
So good. And so in love with Spain. 

Wednesday, August 29, 2012

Have Fat Kids Will Travel

Fat Kids in Spain - Day 1

Our first breakfast in Barcelona - Egg Sandwiches
Mercat de la Boqueria

Fresh almonds

Amazing fruits and veggies
Dragonfruit

Yes, those are hooves.

Drink of Choice

Pimentos de padron - so fucking good

Best peppers ever and Grilled Octopus

Seafood Paella

Meat Stick

Bottoms Up

Sunday, August 26, 2012

Travelin', Diabetic-Style

I'm a wicked over packer, but my diabetes brings it to a whole new level! When I go on vacation, I have enough diabetes supplies to keep me alive for 6 months! Great news in case of a zombie apocalypse!

Since I've been doing a lot of travelling this summer,  I thought I'd share with you my Diabetes Travel Tips.

1a. Always bring extra. I bring double the amount I think I'll need when I'm going away with a few speciality items thrown in for ha-ha's. I usually pack syringes, a back-up glucose tester, and even an extra insulin pen (just in case something goes wrong with my pump).
1b. If using a pump, check with the pump manufacturer about a loaner program for travel. Medtronic offers a travel loaner pump for the low bargain price of $50. Well worth it if you think about being stuck in another country and your pump malfunctions.


2. Always have a way to treat low blood sugar. Most people ask why I don't just carry juice with me. One reason is because drinking a warm juice that's been sitting in my purse for the last week is a little gross. The second reason is that having a juice box explode all of your bag really fucking sucks! Because of that, I like to steal honey packets from Starbucks and sneak myself the fun treat of Annie's Fruit Bunnies!!! Tropical Flavor! Ooooo!


3. Play the diabetic card when it comes to snacking. I always play the diabetic card when it comes to bringing snacks on an airplane! I need food, people! I like to pack snacks with and without carbs, like carrots, celery, and granola bars. You may notice the carb count written in Sharpie on the ziplock bags. I portioned out from larger boxes the correct serving size so I knew how many carbs were in each item. You may call this anal. I call it organized!


4. Be prepared to check blood sugar more frequently. Airplanes do wonky things to my blood sugar. So does ingesting large quantities of tapas and Sangria. Which also leads to...

5. Accepting that you may have need more insulin then usual.

6. A letter from my doctor is a must. Not that having a insulin filled beeper strapped to my side or a carry-on bag filled with syringes and insulin viles isn't enough to let TSA know that I have a medical condition, a letter from my doctor is pretty hard for knuckleheads working at the airport to dispute.

7. Think about where you're going and develop a plan. And not just in that day-dreamy "I can't wait to be sippin' on Sangria" kind of way. More in a "Will I be close to medical care in the event something goes wrong?" kind of way. Not nearly as fun and sexy, but a definite must. Are you travelling state-side? Are you going camping? Or are you going international? Can you speak the language well enough to get needed medical attention? Are you traveling with someone who knows enough about your diabetes to explain it if you aren't able to? Again, not fun stuff, but important!

8. Have personal medical information written in the language of the country you'll be visiting. Diabetes isn't something that one can easily explain through hand-gestures. It's best to have something written out in the doctor's own language. If there is a reason to seek medical care on vacation, you don't want to add to the drama by not articulating your pre-existing condition.

9. Write down your pump settings or insulin injection doses. I did this on the way to the airport and put it in several places. Just in case something goes wrong with my pump or if Jerry needed to communicate by dosage needs in case I wasn't able too.

10. Adjust for time differences. I always forget when I travel into different time zones to change the time on my pump. The same applied when I was using pens. When I was using Lantus, I had to adjust for the time change.

11. Remember that diabetes doesn't have to run or ruin a trip. It's just something that's there.

Tuesday, August 21, 2012

Pity Party

I'm home from work today. And not for a good reason.

Sadly, I'm sick.

The problem with being sick, besides its obvious suckiness, is that it has a way of throwing your blood sugar through a loop. Illness can cause blood sugar to spike for no apparent reason other then your body just wanting to fuck with you. The problem with high blood sugar, besides its obvious suckiness, is that it can cause you to become dehydrated. Which is probably the worst thing to be when you're sick since it inhibits your immune system.

And when I say "your," I mean "my". The diabetic in this conversation.

What had started last week as a sore throat has now turned into a full body ache. It sucks. I'm not a happy camper, especially considering that I had this whole exercise/diet plan for this week in preparation for Spain. So far, that's in the crapper since I have little desire to get out of bed right now, but do seem to have an all-consuming desire to eat everything chocolate!

What's the old adage say....starve a fever, feed a cold chocolate-peanut baked oatmeal for breakfast?

Well...it does now.


Chocolate-Peanut Butter Baked Oatmeal

by Bonnie Graham
Cook Time: 18 - 20 minutes
Keywords: bake breakfast snack vegetarian oats peanut butter


Ingredients (1 large serving)
  • 1/2 c rolled oats
  • 1/4 tsp pure vanilla extract
  • 1/4 c apple sauce
  • 1/4 c milk
  • 1 - 2 packets Truvia or 4 tsp sugar of choice
  • 1/8 tsp salt
  • 1 tbsp cocoa powder
  • 1-2 tbsp peanut butter
  • Optional: chocolate chips
Instructions
1. Preheat oven to 375 degrees.
2. Combine all ingredients and mix well. Melt peanut butter in microwave for easier mixing.
3. Pour into a greased ramekin or a mini-loaf pan. Cook for 18 to 20 minutes, until it gets firm.
4. Optional - Set your oven to broil for 2 more minutes, or until it reaches desired crispness (broiling gives it a nice crust).
Powered by Recipage

Monday, August 20, 2012

Salsa Soup

Of course, the first day I decide to do my "detox," this ridiculousness shows up in the kitchen at work.


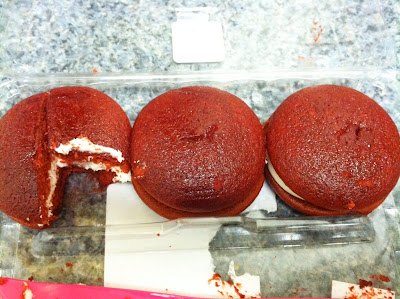
Really?! Fucking really? Red velvet whoopie pies! On the very first day!

You know what? Fuck you, Universe. I resisted your temptations. I passed those beautiful, delicious whoopie pies right on by. You think you can tease me? Ha! I laugh in the face of your pitiful ruse!

Even if I did hold the container up to my nose to smell their sweet, cakey aroma. It's not the same as eating them. Sadly.

In some of the detoxes I've looked at in the past, they suggest a few days of a liquid diet, either through smoothies, juices, or broths. While I'd normally be down to try a day or two of hot veggie broth, I am not willing to do such a thing in August in between heat waves. That would be just as silly as holding a plastic to-go container of whoopie pies to your nose. Who would do that?!

Instead, I did what I thought was the next best thing.


It may look like my fancy plastic spoon is in a bowl of salsa, but it's actually Gazpacho! I love gazpacho since it's essentially a cold tomato sauce that is social acceptable to eat directly out of the fridge. I love sauce!

I prefer my gazpacho to have some texture to it (hence the almonds in this recipe), so I don't usually puree it too much. This is definitely a personal preference you can adapt to your own taste.


Salsa Soup aka Gazpacho

by Bonnie Graham


Ingredients
  • 1 - 2 garlic cloves
  • 1 cucumber, cut into quarters
  • 1 medium red onion, cut into quarters
  • 1 avocado (optional)
  • 1 - 2 chipotle peppers in adobe sauce
  • 1 large can crushed tomatoes
  • 1 tsp oregano
  • 1 tsp smoked paprika
  • 1/3 c slivered almonds (optional)
  • 1 tbsp olive oil
  • 2 tbsp red wine vinegar
  • salt and pepper
Instructions
1. Add garlic cloves to food processor and process to small pieces (to prevent from huge, nasty bites of garlic)
2. Add quartered veggies and process into smaller pieces. Add avocado, if using.
3. Add crushed tomatoes, chipotle peppers, olive oil, red wine vinegar, almonds, and seasonings to food process. Process until desired consistency.
Powered by Recipage

Sunday, August 19, 2012

Final Week

In exactly one week, we will be leaving for Barcelona!!!!! Wahoo!

I couldn't be more friggin' excited! That means I only have one more week of getting in shape for this trip.

Truth be told, I haven't seen much movement on the scale. In fact, there are some days where I've been up a pound or two. However, I am noticing a difference in how I feel. I feel stronger, tighter, and just generally more in shape. I've been running a few miles a couple of times a week, hitting the gym much more regularly, and eating better in the day to day (weekends DEFINITELY excluded).

This week, I'm hoping to tighten up my diet even more and plan on going to the gym every day. It's ambitious, but we'll see how it goes.

Friday, August 17, 2012

Ch-Ch-Ch-Chia

As in the Chia Pet. Remember those?


The new-fangled, health craze these days are the same seeds you use to smear onto a clay-shaped cow and waited to sprout "hair." They're now suggesting you eat those things!! Crazy kids these days. 

I have, of course, jumped onto the chia seed bandwagon and started to eat what had once been a brown substance smeared onto a planter. In all honesty, it wasn't my favorite ingredient. It's one of those things I could toss into my smoothie or oatmeal and not even notice it's there.

Wanting to do more with my expensive chia seed besides disguise it, I was excited to find a recipe using them in pudding! 

I'm not sure if I've mentioned this, but I have a thing for pudding. The same kind of thing I have for sauce, dips, soups, vegetables, farmer's markets, and pretty much anything else I can put in my mouth. Wait...I mean that I can swallow....Jerry's getting happier by the minute. You know what I mean!

The great thing about this pudding is that it can be made in an instant with all natural ingredients that you probably already have in your pantry. Chia seeds have this gelling quality that allows the pudding to thicken. In fact, this recipe is so easy, I've already made it twice this week! Plus, it's pretty good on my sugar!

Jerry even tried to talk me into making it twice in one night. He almost had me convinced. 


Chocolate Chia Pudding

by Bonnie Graham
Keywords: blender dessert snack vegetarian chia seeds


Ingredients (3 servings)
  • 1 c milk of your choice (I do find almond milk to set up quicker)
  • 3 packets Truvia (or 6 tsp sugar)
  • 1 tsp honey
  • 3 tbsp chia seeds
  • 1 1/2 tbsp cocoa powder
  • 1/8 tsp sea salt
  • 1/2 tsp pure vanilla extract
  • 2 tbsp chocolate chips (optional)
Instructions
1. In a blender, add milk, sugar, chia seeds, cocoa, salt, and vanilla.
2. Blend for a minute or more, until the seeds are fully pulverized. I use the grinder blade on my Magic Bullet.
3. Transfer to dishes. Stir in chocolate chips, and refrigerate until chilled, about 1/2 hour or more.
Powered by Recipage

Wednesday, August 15, 2012

Eat the Rainbow


Now, this is what I'm talking when it comes to eating the rainbow! Who needs those stupid sugar-coated candies anyway?!

I bumped up my budget at this week's farmer's market to $15. I know. Big spender! This week, I'm only $.75 over budget. Well worth it when you consider all of the stuff I got.

This week's roundup:
2 heirloom tomatoes and 5 vine-ripened tomatoes - $5.00
3 lemons - $1.00
7 nectarines - $2.75
2 cucumbers - $.50
2 ears of corn - $.50
1 bunch of onions - $2.00
1 bunch of celery - $2.50
1 head red lead lettuce - $1.50
Total: $15.75

I have some plans for that head of celery! Oh, you just wait.

Tuesday, August 14, 2012

Never Say Never

A few nights ago, I did something, that as a diabetic, I swore I would never do.

After a lovely girls night out with my friends (who I refer to as ABC), I stumbled into the apartment, exhausted and blurry eyed, at 1AM. We hadn't even been drinking! I walked into the bathroom and step on something wet and squishy. I immediately panicked. With two cats in the house, you just never know.

Someone had thought it was a good idea to dunk this toy in the toilet and leave it on the floor for an unsuspecting human. But we're not naming names. 

I digress.

Realizing that an alarm had gone off on my pump, alerting me to a low reservoir of insulin, I knew I couldn't wait until the next morning to refill. Feeling my way like Helen Keller through my bedroom, trying not to disturb a sleeping Jerry, I grabbed all of the tools for changing my infusion site and insulin reservior. One these tools being an obvious one of insulin. Duh, right?


When I was first diagnosed with diabetes, I read many diabetes blogs, talking about the trials and tribulations of being diabetic, taking insulin, living life, etc. One thing many of these bloggers discussed was the annoyance of dropping and shattering an insulin vial. How annoying. How expensive. How smelly. Insulin has very distinct smell. 

In my arrogant little mind, I thought, "How irresponsible! I would never shatter any of my insulin vials."

Guess what I was cleaning up off the kitchen floor, trying to stop the cats from rolling in, at 1:15 AM?

Call me irresponsible. 

Friday, August 10, 2012

Almight Chickpea, Part 3

Had I realized in my initial post about chickpeas, where I compared myself to that of a Native American using all the parts of the animal, that I was instructing Jerry to soak 2 1/2 POUNDS of chickpeas, I would not have been so liberal in my language use. TWO AND HALF POUNDS of chickpeas has got to be the equivalent of three water buffalo in Native American terms!

My apologies to any Native Americans I may be offending....that happen to be reading my blog. Please don't skin me. :) No, no, I'm just kidding. Geez, you have your land pilfered while genocide to your people occur and you lose your funny bone!

Anyway, back to my "water buffalo." With a pledge to use every chickpea and plenty of recipes to use them in, I set out to create yet another interesting dessert using the Almighty Chickpea. I'm lovin' this "put beans in your dessert" thing we've go going on here. It just feels healthier to me for some reason.

Never mind that I probably wouldn't have made a dessert if I hadn't made TWO AND HALF POUNDS of chickpeas, but whatever.

On that note, I give you the Snickerdoodle Blondie.

Snickerdoodle Blondie

by Bonnie Graham
Keywords: bake food processor dessert breakfast low-carb beans cinnamon


Ingredients
  • 1 1/2 cups chickpeas
  • 3 T nut butter
  • 3/4 tsp baking powder
  • 1-2 tsp vanilla extract
  • 1/8 tsp baking soda
  • heaping 1/8 tsp salt
  • 5 packets of Truvia (or 3/4 cup brown sugar)
  • 1 T unsweetened applesauce
  • 1/4 cup quick cooking oats
  • 2 and 1/4 tsp cinnamon
  • a pinch cream of tartar
Instructions
1. Preheat oven to 350 degrees.
2. Blend all ingredients until very smooth, and scoop into a greased 4 greased ramekins
3. Bake for 35-40 minutes. Blondies will seem slightly undercooked when you take them out, because they’ll firm up as they cool.
Powered by Recipage

Wednesday, August 8, 2012

Dirty Veggies, Part 7

Okay. Here are my thoughts. Get ready.

The whole point of me going to the farmer's market each week, in addition to getting ridiculously good veggies, is to support local farmers, right? And if I end up going to the supermarket to supplement my produce because I didn't buy enough at the farmer's market...well, aren't I just giving into The Man? I might as well hand out dollar bills at Walmart!

This is how I am justifying this week's overexpenditure.

Which I actually think is totally valid logic. In fact, I'm thinking it's so logically, I might increase my weekly budget to $15! Gasps! If I'm using the farmer's market as my primary source of produce, shouldn't I be able to spend a little bit more to supplement?

I can see you nodding your head through the screen.

I thought you would agree.


This week's roundup:
2 cucumbers - $.50
1 bunch carrots - $1.75
1 head green leaf lettuce - $1.50
1 gigantic head of collard greens - $2.00
1 white eggplant - $1.35
6 peaches - $2.25
2 beautiful heirloom tomatoes - $3.05 (my splurge)
Total: $12.40....only $2.40 over-budget


Tuesday, August 7, 2012

'Shrooming

With a two-hour foraging class under our belts, Jerry and I decided it was a good idea to pick up some wild mushrooms on this weekend's hike. 

During this hike, a pair of lost souls came upon us, asking for directions as they had gone wildly off track from their initial route. Realizing that it was late in the day and that we couldn't give them proper directions to get back to their car without potential sending them deeper into the woods in the wrong directions, Jerry offered them a ride to their car if they wanted to follow us back to ours.

With introductions made, a 2.5 mile trek back to our car began. Along the way, Jerry and I looked for the mushrooms we had identified earlier in the day as non-toxic. Having to explain to this probably now very concerned couple who were wondering what they had gotten themselves into that we would be picking up mushrooms on our way back for us to eventually eat for breakfast tomorrow was....awkward.

We shared that we had taken a foraging class a few weeks ago and that Jerry had purchased a mushroom identification book. We were practically experts! Jerry joked "Unless I ask you to get on my unicorn when we get back to the car. In that case, you can take my keys from me."

"Are you really going to eat those?" they asked. 
"Yeah, definitely" we replied. 
Which I then verified with a "Well, Jerry's going to eat them first. Then we'll see how it goes." The mushroom jokes are endless. 

After scouring the internet for hours, with Jerry showing me similarly looking poisonous mushrooms to those sitting on our kitchen counter, he assured me that our mushrooms were good to-go.....probably. That's the vow of confidence one needs to potentially poison themselves! Saute those babies up!


Jerry's not much of a recipe guy, but I can tell you that this saute had mushrooms, zucchini, garlic, onions, and probably lots of different seasonings. It was good. And only caused a little bit of explosive diarrhea.

Sunday, August 5, 2012

August Challenge Page

Okay, I've been yammering on about my countdown to Spain, my need to get back into shape, blahblahblah and all that good stuff. We leave for Spain in exactly three weeks.

THREE WEEKS!!

Which means I need to get a jump on things. This past week, I've gotten back into the habit of going to the gym (going 5 days out the last 7 and taking a 9-mile hike). I definitely feel good about that.

However, my eating has not followed suit. I'd like to think it's because I've been doing this whole Tata Exposing countdown in stages, the first being exercise and the second being diet.

But that would be total bullshit. I'm just a fat kid.

This week, I hope to change that. One way I hope to do that is to hold myself accountable using this blog. I've created a new page dedicated to the "challenge" of the next three weeks, which I'll use as a food/exercise log.

A hopeful by-product of such a page will also be better blood sugar control. While my blood sugars have been okay, they haven't necessarily been great. I've had a lot more high blood sugars then I'd like in the last month or two. In fact, I'm a little concern that my A1c will be higher when I go for my endo appointment in September. While I accept that this is the natural biorhythm of being a diabetic, it doesn't necessarily feel good.

Of course, I don't expect anyone else to be interested in my daily diet.

But that's why this is my blog. And not yours. :)


Friday, August 3, 2012

Disaster Area

Holy moly, making this recipe was a total shit show!

It may partially be my fault. Despite arriving home an hour later then expected, I decided that going to an 8:00 Boot Camp class at the gym would still leave me plenty of time to make this recipe and enjoy the rest of my evening. Have I mentioned I'm my father's daughter and that the concept of time is something that frequently eludes us?

When I returned home from the gym, I started working on what was initially called a Kale-Farro Market Salad. Until I realized I had no farro.

Actually, let me correct myself.

Until I realized that I couldn't tell which bag of grain, out of the many, many bags of grains we have in our cupboards, was actually farro. Was it this one? No. How about that one? Maybe. It got so bad that I woke Jerry for his "expert" advice. To which he responded that every single bag I presented was filled with barley. I don't think he wanted to play my game.

After I scoured the internet, comparing each little grainlet to Google Images, I decided to just give up and make what was actually identifiable as barley. But it was hulled barley. Which means that it takes over an hour to cook. Well, I just wasn't feeling up to waiting a WHOLE hour for barley to cook. I figured I'd use my trusty pressure cooker.

Which cooked nothing.

After 45 minutes of listening to the pressure cooker gauge lock and unlock, I gave up on that as well and decided to pour the whole thing into a pot and cook it the good ol' fashion way. I'm not sure how, but it seemed to take a full two and half hours to cook this barley that should have been done in an hour.

While the barley cooked, I prepped the other ingredients for the salad. Kale was the star for this one. I picked up Tuscan Kale at the farmer's market and was so excited to use it. Until I tasted it. And had to stop myself for spitting it out. How is this possible? How are there millions of kale salad recipes out there yet I manage to pick out the one variety of kale that tastes like varnish?!

Again, I went back to my old reliable Google and searched "how to make raw kale not taste like ass?" Apparently, you need to be gentle with your kale and give it a good rub. Massage your kale to help break down the watchmacallits and speed up the somethingtechnical process to reduce its bitterness.

I was ready to do a striptease for this friggin' kale if it meant salvaging this disaster of a salad.


Ridiculous long story short....this salad was really good! I've eaten three times.

Try it for yourself.

Kale-Barley Market Salad

by Bonnie Graham
Keywords: food processor salad vegetarian kale grain nuts carrots


Ingredients
    Salad Ingredients:
    • 1/2 bunch kale, destemmed, torn into pieces
    • 1 cup cooked barley
    • 4-5 farmers' market carrots, very thinly sliced
    • 2 celery stalks, thinly sliced
    • 1 avocado, cut into small cubes
    • a big handful of toasted, slivered almonds
    Green Garlic Dressing Ingredients:
    • 2 stalks scallions, rinsed and chopped
    • 1/4 teaspoon fine grain sea salt, plus more to taste
    • 2 tablespoons fresh lemon juice
    • 1/3 cup extra virgin olive oil
    • 2 tablespoons ripe avocado
    • 1 teaspoon honey, or to taste
    • fresh pepper to taste
    Instructions
    1. Puree the scallions, salt, lemon juice, olive oil, avocado, honey, and pepper until smooth in a food processor. Adjust seasonings to taste.
    2. Combine the kale with about half of the dressing in a large bowl use your hands to work the dressing into the kale, softening up the kale a bit in the process.
    3. Add the barley, carrots, and celery, more dressing, and a couple pinches of salt, and toss again. Taste.
    4. Add the avocados and almonds. Give one last toss.
    Powered by Recipage

    Wednesday, August 1, 2012

    Dirty Veggies, Part 6

    I needed to go over budget at today's farmer's market.

    No, really. I did.

    And it wasn't one of those "I need as many golden beets and heads of red lettuce that I can squeeze into my eco-friendly shopping bag" kind of need. No, it was a "I have to feed 8 people a deliciously large, locally grown salad for lunch tomorrow...oh and dessert too" need.

    My team at work are a bunch of fat kids. We love to get our eat on and try to work it into every single meeting we have. Potlucks are a frequent occurrence. And I love it.

    For this week's potluck lunch, I wanted to re-create a salad from one of my favorite natural food blogs, 101 Cookbooks. The appeal of this salad was that it uses ingredients that I see every week at the farmer's market. Hence the reason for going over budget.

    Notice my little wooden piggy in the background. 
    This week's roundup:
    6 avocados - $3.75*
    2 zucchini - $2.00
    1 gigantic head of kale - $2.00
    1 bunch carrots - $1.75
    1 bunch celery - $2.00
    6 white peaches - $2.50
    Total: $14.00

    Recipe to follow.

    *Okay, okay, I know these aren't locally grown, but if I can help a small farm stand help make a buck when it supplements its usual produce with some imports, then fine. At least that's how I justify it in my head.